

Create hyperlinks
You can create hyperlinks so that when you export to Adobe PDF, a viewer can click a link to jump to other locations in the same PDF document, to other PDF documents, or to websites.
A source is hyperlinked text, a hyperlinked text frame, or a hyperlinked graphics frame. A destination is the URL, position in text, or page to which a hyperlink jumps. A source can jump to only one destination, but any number of sources can jump to the same destination.
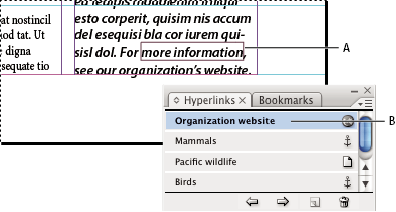
- A.
- Hyperlink source
- B.
- List of hyperlinks
To create a hyperlink to a position in text or to a page with specific view settings, you first create a destination, and then you create the hyperlink that points to that location.
InDesign supports three kinds of hyperlink destinations:
- Document page
- When you create a page destination, you can specify the zoom setting of the page being jumped to.
- Text anchor
- A text anchor is any selected text or insertion-point location in a document.
- URL destination
- A URL destination indicates the location of resources on the Internet, such as a web page, a movie, or a PDF file. The name of a URL destination must be a valid URL address.
Hyperlink destinations do not appear in the Hyperlinks panel; they appear in the Destination section of the New Hyperlink dialog box.
 Create a hyperlink
- If necessary, create a hyperlink destination.
- Select the text or graphic you want to be the hyperlink’s source.
- Choose Window > Interactive > Hyperlinks to display the Hyperlinks panel.
- Choose New Hyperlink in the Hyperlinks panel menu, or click the Create New Hyperlink button at the bottom of the Hyperlinks panel.
- For Name, type the name of the hyperlink. The name you type will appear in the Hyperlinks panel.
- For Document, select the document containing the destination that you want to jump to. All open documents that have been saved are listed in the pop‑up menu. If the document you’re looking for isn’t open, select Browse in the pop‑up menu, locate the file, and then click Open.
- For Type, select Page, Text Anchor, or URL to display the available destinations for that category. To display all destinations, select All Types.
- For Name (under Destination), do one of the following:
-
To create a hyperlink to a destination you created, choose the destination name.
-
To create a hyperlink to an unnamed destination, choose Unnamed. If Page is selected for Type, specify the page number and zoom setting. If URL is selected for Type, specify the URL you want to jump to.
-
Select None to create a hyperlink with no destination.
-
- To specify the appearance of a hyperlink in InDesign
and in the exported PDF file, do the following, and then click OK:
-
For Type, select Visible Rectangle or Invisible Rectangle.
-
For Highlight, select Invert, Outline, Inset, or None. These options determine the appearance of the hyperlink in the exported PDF file.
-
For Color, select a color for the hyperlink rectangle.
-
For Width, select Thin, Medium, or Thick to determine the thickness of the hyperlink rectangle.
-
For Style, select Solid or Dashed to determine the appearance of the hyperlink rectangle.
-
 To show or hide hyperlinks, choose View >
Show Hyperlinks or Hide Hyperlinks.
To show or hide hyperlinks, choose View >
Show Hyperlinks or Hide Hyperlinks.Create a hyperlink from a URL
- Using the Type tool, select a URL (such as http://www.adobe.com) that you’ve typed in your document.
- Choose New Hyperlink From URL in the Hyperlinks panel menu.
Set up a page destination
You can create a hyperlink to an unnamed page without first creating a destination. However, by creating a page destination, you can name the page and specify a view setting.
- Choose Window > Interactive > Hyperlinks to display the Hyperlinks panel.
- Choose New Hyperlink Destination in the Hyperlinks panel menu.
- For Type, select Page.
- For Name, type a name for the page destination. To automatically use the page number as the name, select Name With Page Number.
- For Page, specify the page number you want to jump to. (If you selected Name With Page Number, the Name option updates automatically.)
- For Zoom Setting, do one of the following to select the
view state of the page being jumped to, and then click OK:
-
Select Fixed to display the magnification level and page position that were in effect when you created the link.
-
Select Fit View to display the visible portion of the current page as the destination.
-
Select Fit In Window to display the current page in the destination window.
-
Select Fit Width or Fit Height to display the width or height of the current page in the destination window.
-
Select Fit Visible to display the page so that its text and graphics fit the width of the window, which usually means that the margins are not displayed.
-
Select Inherit Zoom to display the destination window at the magnification level the reader will use when the hyperlink is clicked.
-
Set up a text anchor destination
- Choose Window > Interactive > Hyperlinks to display the Hyperlinks panel.
- In the document, use the Type tool to place the insertion point, or select the range of text, that you want to be the anchor. You cannot set up an anchor destination for text on a master page.
- Choose New Hyperlink Destination in the Hyperlinks panel menu.
- Choose Text Anchor in the Type pop‑up menu.
- Type a name for the destination, and then click OK.
Set up a URL destination
- Choose Window > Interactive > Hyperlinks, to display the Hyperlinks panel.
- Choose New Hyperlink Destination in the Hyperlinks panel menu.
- Choose URL in the Type pop‑up menu.
- Type or paste a URL, such as http://www.adobe.com. You can use any valid Internet resource protocol: http://, file://, ftp://, or mailto://.
- Specify a name for the URL destination, and then click OK.