

Create an image for use in video
- Optional To view the image as it would
appear on a computer monitor (square pixel), choose View >
Pixel Aspect Ratio Correction.
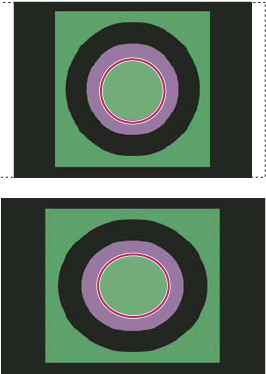 Circle in NTSC DV (720 x 480 pixels) document viewed on computer (square pixel) monitor with Pixel Aspect Ratio Correction turned on (top) and Pixel Aspect Ratio Correction turned off (bottom)
 You can simultaneously view an image with the Pixel
Aspect Ratio Correction turned on and off. With the nonsquare pixel
image open and Pixel Aspect Ratio Correction enabled, choose Window >
Arrange > New Window For [name of document]. With the
new window active, choose View > Pixel Aspect Ratio
Correction to turn off the correction.
You can simultaneously view an image with the Pixel
Aspect Ratio Correction turned on and off. With the nonsquare pixel
image open and Pixel Aspect Ratio Correction enabled, choose Window >
Arrange > New Window For [name of document]. With the
new window active, choose View > Pixel Aspect Ratio
Correction to turn off the correction.
When creating images for video, you can
load a set of video actions (included with Photoshop) that automate
certain tasks—such as scaling images to fit video pixel dimensions
and setting the pixel aspect ratio.