

Transform perspective while cropping
The Crop tool has an option that lets you transform the perspective in an image. This is very useful when working with images that contain keystone distortion. Keystone distortion occurs when an object is photographed from an angle rather than from a straight‑on view. For example, if you take a picture of a tall building from ground level, the edges of the building appear closer to each other at the top than they do at the bottom.
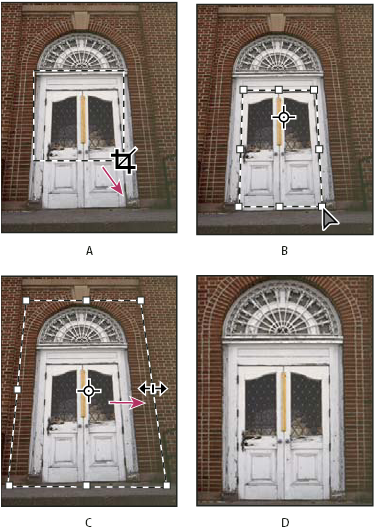
Steps to transform perspective
- A.
- Draw initial cropping marquee
- B.
- Adjust cropping marquee to match the object’s edges
- C.
- Extend the cropping bounds
- D.
- Final image
- Select the Crop tool
 and
set the crop mode.
and
set the crop mode. - Do one of the following:
-
Press Enter (Windows) or Return (Mac OS), click the Commit button
 in
the options bar, or double-click inside the cropping marquee.
in
the options bar, or double-click inside the cropping marquee. -
To cancel the cropping operation, press Esc or click the Cancel button
 in the
options bar.
in the
options bar.
-