

Select with the Magnetic Lasso tool
When
you use the Magnetic Lasso tool  , the
border snaps to the edges of defined areas in the image. The Magnetic
Lasso tool is not available for 32‑bits-per-channel images.
, the
border snaps to the edges of defined areas in the image. The Magnetic
Lasso tool is not available for 32‑bits-per-channel images.
 The Magnetic Lasso tool is especially useful for
quickly selecting objects with complex edges set against high-contrast
backgrounds.
The Magnetic Lasso tool is especially useful for
quickly selecting objects with complex edges set against high-contrast
backgrounds.- Specify one of the selection options in the options bar.
 Selection options
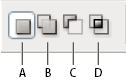
- A.
- New
- B.
- Add To
- C.
- Subtract From
- D.
- Intersect With
- Set any of these options:
- Width
-
To specify a detection
width, enter a pixel value for Width. The Magnetic Lasso tool detects
edges only within the specified distance from the pointer.
To change the lasso pointer so that it indicates
the lasso width, press the Caps Lock key. You can change the pointer
while the tool is selected but not in use.
- Contrast
- To specify the lasso’s sensitivity to edges in the image, enter a value between 1% and 100% for Contrast. A higher value detects only edges that contrast sharply with their surroundings; a lower value detects lower-contrast edges.
- Frequency
-
To specify the rate at which the lasso sets fastening
points, enter a value between 0 and 100 for Frequency. A higher
value anchors the selection border in place more quickly.
On an image with well-defined edges, try a higher
width and higher edge contrast, and trace the border roughly. On
an image with softer edges, try a lower width and lower edge contrast,
and trace the border more precisely.
- Stylus Pressure
-
If you are working
with a stylus tablet, select or deselect the Stylus Pressure option.
When the option is selected, an increase in stylus pressure decreases
the edge width.
While creating a selection,
press the right bracket (]) to increase the Magnetic Lasso edge
width by 1 pixel; press the left bracket ([) to decrease the width
by 1 pixel.
- If the border doesn’t snap to the desired edge, click
once to add a fastening point manually. Continue to trace the edge,
and add fastening points as needed.
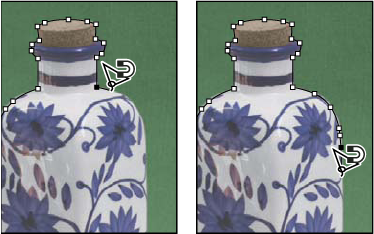 Fastening points anchor selection border to edges